
My Cup Of Tea Socks (Reversed)
A quick write-up of my process for converting a cuff-down sock pattern to toe-up as part of my most recent project.
I absolutely love making socks. As a project, they’re relatively quick, by now very familiar, a small canvas for a bit of experimentation, and in the end, always useful. After all, who doesn’t need another pair of socks?
Unfortunately, that’s also caused me to amass quite the collection of sock yarn over the years. In fact, I spent a good part of 2019 making sock after sock after sock thanks to our indulging in a Michael’s Boxing Day sale back at the start of last year.
But, I’ll be the first to admit, the stash has been building up for a long time, now.
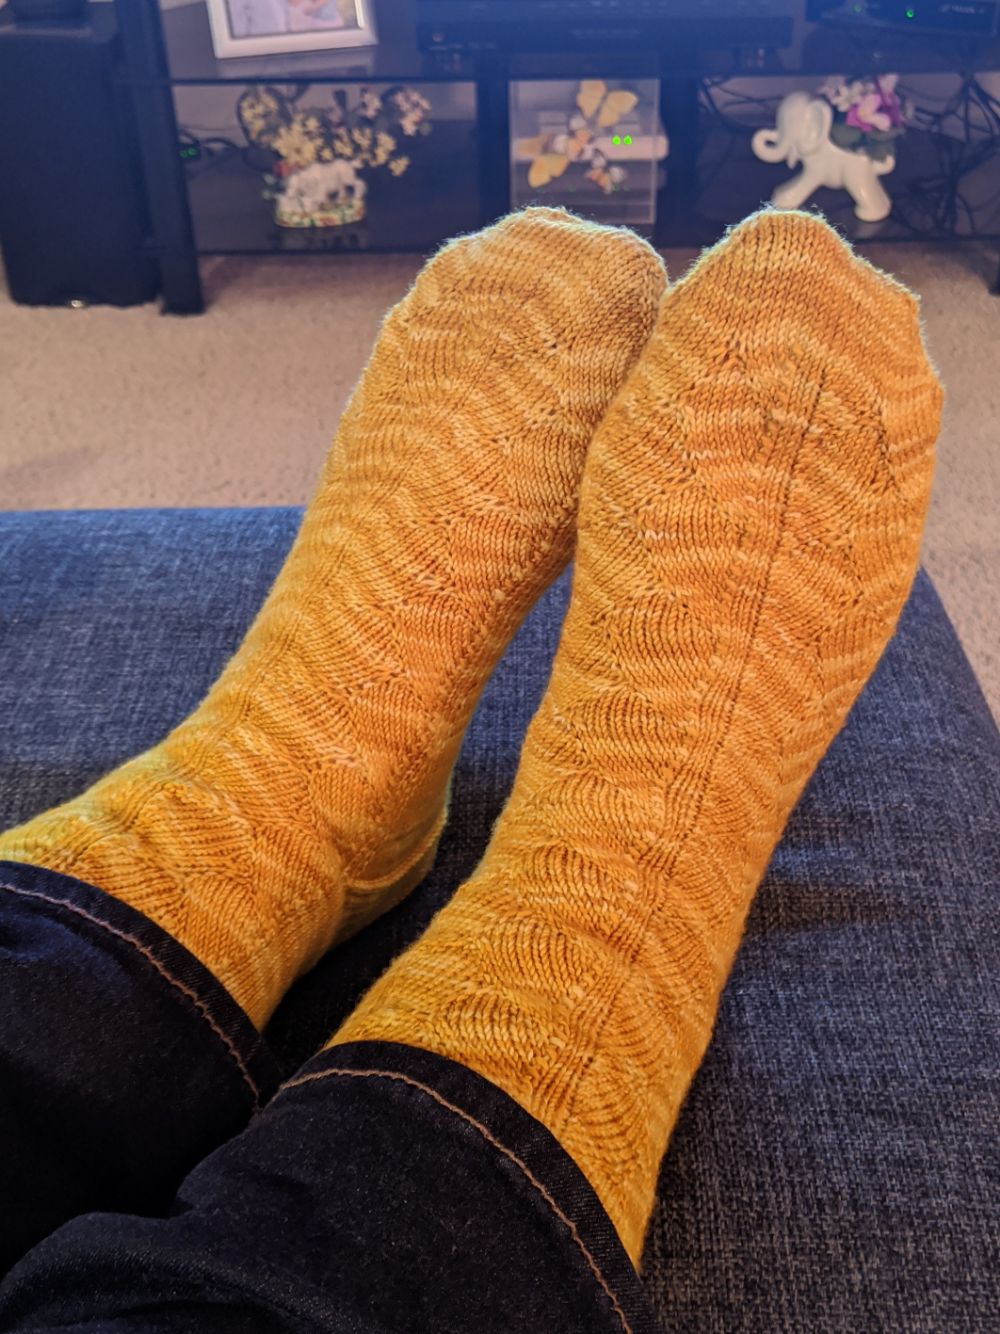
As a result, the yarn that I used in this project–a lovely, variegated yellow yarn who’s label I’ve apparently lost–has been sitting in my collection for a couple of years now, having been pushed down the queue by more recent acquisitions. However, I finally decided to do something with it!
Now, as a toe-up sock knitter, it’s always a bit trickier to find patterns, and so I’ve often settled for coming up with my own designs1. However, this time, I decided to try my hand at converting an existing cuff-down pattern to toe-up.
These socks are based off of the My Cup of Tea Socks2 pattern (hosted on Ravelry), which I then altered, both to convert the pattern to toe-up, and to make the motif a bit larger.
Chart notation
Throughout this post I use a knitting chart symbol font from StitchMastery called StitchMasteryDash. If your browser doesn’t support native TrueType fonts, well, now you have a good reason to upgrade!
Below is a quick legend for the symbols:
| Symbol | Description | Symbol | Description |
|---|---|---|---|
| : | Make one left | ; | Make one right |
| r | k2tog | q | ssk |
| = | Make two | k | Knit |
Note, in this pattern, the m2 I use is a double lifted increase that doesn’t appear in any stitch dictionary I have at hand (though I’m sure it’s an unvention, so if someone knows the name of this thing, I’d love to hear it!) Of course, if you can find a better option, please, substitute as you see fit!
Specifically, I used the following stitch: Start with a normal lifted m1r, but after completing the first stitch, instead of slipping the left stitch off the needle, knit into the back loop first (put another way, it’s like increasing by knitting in to the front and back of the next stitch, except instead of knitting into the next stitch you knit into the lifted bar). The result is a slightly bulky double increase with no visible hole.
Reversing the motif
The tricky part of converting this sock from cuff-down to toe-up is the pattern motif. This chart shows the normal cuff-down design (I’ve removed the knit rounds so this is only the motif stitches):
:kkkkkrqkk;kk:kkrqkkkkk;
:kkkkrkkqk;kk:krkkqkkkk;
:kkkrkkkkq;kk:rkkkkqkkk;
:kkrqkkkkk;kk:kkkkkrqkk;
:krkkqkkkk;kk:kkkkrkkqk;
:rkkkkqkkk;kk:kkkrkkkkq;
Looking at this chart, you can see the visual effect is created through a mix of increases on the borders of the motif and decreases in the middle, resulting in a scalloped design.
Reversing this design for a toe-up knitter like myself is a pretty natural process:
- Flip the pattern rows top-to-bottom3
- Convert decreases to increases and vice versa, matching direction
- k2tog <-> m1r
- ssk <-> m1l
- k2tog, ssk -> m2
Which gets you this result:
q:kkkk;kkkrkkqkkk:kkkk;r
qk:kk;kkkkrkkqkkkk:kk;kr
qkk-=kkkkkrkkqkkkkk-=kkr
qkkk:kkkk;rkkq:kkkk;kkkr
qkkkk:kk;krkkqk:kk;kkkkr
qkkkkk-=kkrkkqkk-=kkkkkr
Enlarging the motif for size
As I mentioned in the introduction, I also wanted the motif to be a bit wider, to take up the full width of the top of the foot. Fortunately, the motif lends itself well to naturally expanding it both in width and height. Where the original was 6 rows (12 counting the interstitial knit rounds) over 24 stitches, the new version is 8 rows over 32 stitches:
q:kkkkkk;kkkkkrkkqkkkkk:kkkkkk;r
qk:kkkk;kkkkkkrkkqkkkkkk:kkkk;kr
qkk:kk;kkkkkkkrkkqkkkkkkk:kk;kkr
qkkk-=rkkkkkk;rkkq:kkkkkkq-=kkkr
qkkkk:kkkkkk;krkkqk:kkkkkk;kkkkr
qkkkkk:kkkk;kkrkkqkk:kkkk;kkkkkr
qkkkkkk:kk;kkkrkkqkkk:kk;kkkkkkr
qkkkkkkk-=kkkkrkkqkkkk-=kkkkkkkr
The one tricky bit of note, here, is on row five. It wasn’t until I ran through the motif in a test swatch that I realized I needed a decrease before the m2 in order to keep the stitch counts correct, as unlike in row one, due to the expanded layout, the m2 is preceded by a m1r (which is a combination you don’t see in the original motif).
In hindsight, I probably could’ve just simplified that part to a KFB. But this works!
The rest of the sock
With the motif in hand, the sock itself otherwise followed my usual template (this is on 2.75mm DPNs):
- Cast on 32 stitches using Judy’s Magic Cast-On
- Increase to 64 stitches
- Knit to gusset, using motif on top of foot
- Increase 16 stitches per side for the gusset, continuing motif on top of foot
- Execute the Reverse Dutch Heel using a 24 row heel flap over 16 stitches
- Decrease to 72 stitches for the cuff4
- Knit to length, continuing motif on front of leg
- Finish with 12 rows of 1x1 ribbing
- Cast off using JSSBO
And if you don’t know what most of that means, you should definitely learn you a toe-up sock!5
-
By which I mean I grab a motif from a stitch dictionary and work it in. ↩
-
I picked this chart for a few reasons, but ease of conversion was definitely one of them; reversing a pattern of basic increases and decreases is, as you will see, relatively straightforward. ↩
-
Technically you also need to flip the chart left-to-right, but since the two sides of the motif are mirrored, in this particular case it doesn’t matter. ↩
-
This is actually larger than typical. Usually I decrease to 64 stitches for the cuff, however due to the tighter stitch gauge of the motif, this proved too small. ↩
-
I absolutely love that this website is a little bastion of 2000’s web design. It’s a true throwback to the bad old days of the internet when people ran their own websites and shared their passions without big tech getting in the way. Please never change! ↩
-
{% for webmention in webmentions %}
-
{{ webmention.content }}
{% endfor %}
No bookmarks were found.
{% endif %}Likes
-
{% for webmention in webmentions %}
-
{% if webmention.author %} {% capture author_id %} {% if webmention.author.photo %}{% endif %}{% endif %} {% if webmention.author.name %} {% endif %} {% endcapture %} {% if webmention.author.url %} {{ author_id }} {% else %} {{ author_id }} {% endif %}
{% endfor %}
-
{% for webmention in webmentions %}
-
{{ webmention.content }}
{% endfor %}
No links were found.
{% endif %}Replies
-
{% for webmention in webmentions %}
-
{% if webmention.author %} {% capture author_id %} {% if webmention.author.photo %}{% endif %}{% if webmention.content %} {{ webmention.content }} {% else %} {{ webmention.title }} {% endif %}
{% endfor %}
-
{% for webmention in webmentions %}
-
{% if webmention.author %} {% endif %}{% if webmention.content %} {{ webmention.content }} {% else %} {{ webmention.title }} {% endif %}
{% endfor %}
-
{% for webmention in webmentions %}
-
No reposts were found.
{% endif %}-
{% for webmention in webmentions %}
- {% endfor %}
No RSVPs were found.
{% endif %}-
{% for webmention in webmentions %}
-
{% if webmention.author %} {% endif %} {% if webmention.content %} {{ webmention.content }} {% else %} {{ webmention.title }} {% endif %}
{% endfor %}
No webmentions were found.
{% endif %}