Cybersocks
Toe-up Socks
Instructor Denise Powell

![]()
Lesson Six - Two Stretchy Cast Offs
The first method is easy and can be used on any edge. The second takes more practice and works with single rib only but gives a very elegant finish.
Elizabeth Zimmermann's Sewn Cast off
This is from Knitting Without Tears; it has been a favourite of mine for many years (hmm, that's an ambiguous sentence - I meant the cast off, but it applies equally to the book. . . .)
Break yarn, leaving a tail about 4 times as long as the circumference of the sock. Thread a tapestry needle.
* sew forward (right to left) through two stitches as if to purl, leave the stitches on. Sew backward (left to right) through one stitch as if to knit and remove the stitch.
Repeat from * until you run out of stitches. Work in tail on the inside of the sock and trim any excess.
Denise's variation for circular knitting:
For the very first stitch only, after you go backwards through it, do not remove it, instead move it to be the last stitch on the final needle. It will then become the final stitch to be cast off. This gives a neater finish to the end of the round.
Grafted cast off for single rib
This cast off is the equivalent of grafting or duplicate stitch across the top of the single rib stitches. You will go into each stitch twice, to follow the path the yarn would take if you had knitted the stitches.
Break yarn leaving a tail about 4 times the circumference of the sock. Thread into a tapestry needle.
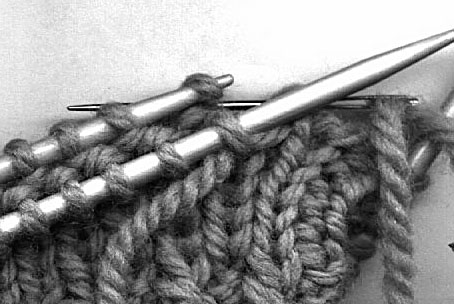
Step One:
Starting with a knit stitch as the first stitch on the needle, on the first needle of your knitting, place the knit stitches on one needle and the purl stitches on another.
If you are working with a nice grabby wool, you can just pull the current needle out, watch the knit stitches spring forward, the purl stitches spring back and slide needles into each king (you can use spare needles of a smaller size if you want).
If you are working with a yarn that isn't grabby or if you feel a bit insecure about this, just slip the first (knit) stitch onto one needle, the second (purl) stitch onto the second and repeat until all stitches have been divided. Again, you can use spare DPNs possibly of a smaller size if you want.
Click on any of the photos for a larger image. Use your browser's back button to return to this page.
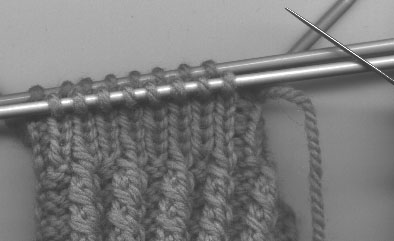 Step one
Step Two:
The first couple of stitches are done one stitch at a time. After this you can do two movements at once. Insert the tapestry needle into the first stitch on the front needle AS IF TO PURL. Pull the yarn through and adjust tension so it's neither tight nor loose.
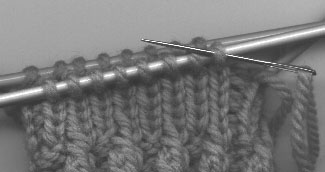 Step two
Step Three:
Now go from front to back through the BACK (left) leg of the last stitch on needle 3 of your sock. This is a purl stitch and it will be the last stitch you eventually cast off. (This step is omitted from many
descriptions of a grafted cast off but it makes a very neat finish on a circular piece.) Pull the yarn snug but not tight. Leave the stitch on its knitting needle - you'll get back to it eventually.
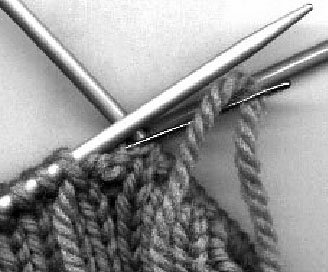 Step three
Step 4:
Insert needle from right to left through right leg of first stitch on back needle (this is a purl stitch).
Pull yarn snug and leave stitch on.
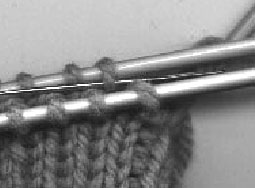 Step four
Step five:
Insert needle from right to left through the BACK leg of the first stitch on the front needle and IN THE SAME MOTION (not necessary, but efficient and less liable to get you lost!) from right to left through the front leg of the second stitch on the front needle. Slip the first stitch off the knitting needle (you have now been through it twice 0 it's done!) and pull the yarn snug.
![]() Step five
Step five
Step six:
Okay, I don't do this all in one swell foop as it were, so this is really two half steps.
First, insert the tapestry needle into the right leg of the first stitch on the back needle (a purl stitch) from right to left. Slip the stitch off the knitting needle. Leave it on the tapestry needle and don't bother to pull the yarn through yet.
![]() Step six/a
Step six/a
Now insert the tapestry needle from left to right through the right leg of the second stitch on the rear needle. (Okay, since you just slipped off the first stitch, I suppose this is the new first stitch. . . .) Pull the yarn snug.
 Step six/b
Step Seven
Repeat steps 5 and 6 until you run out of stitches. After you've cast off 10-12 stitches, check the stretchiness of your cast off. When you finish the stitches from the first needle, perform step 1 on the stitches of the second needle and keep on going. Eventually you develop a nice rhythm.
And finally, here's a look at the completed cast off. I've turned the edge of the cuff down a bit so you can get a look at both sides and the top of the cast off.
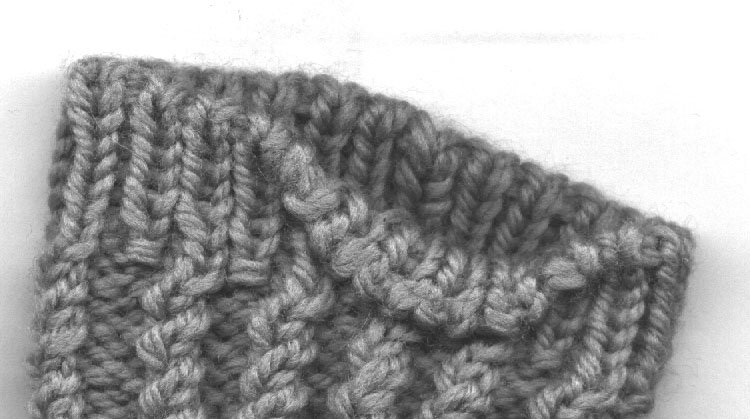 Finished cuff
![]()