Cybersocks
Denise's Toe-up Socks
Instructor Denise Powell

![]()
Lesson Four - The Reverse Dutch Heel
The following heel in my own unvention.
Introduction:
The Reverse Dutch Heel starts with a small flap that is knitted back and forth from the centre of the sole of the foot. You then pick up stitches on each side (which 'turns' the heel) and knit up the back of the heel, joining by decreases to the rest of the sock stitches as you go.
Method:
The little flap is knitted on approximately one sixth of the number of stitches you had on the main part of the foot - before the gusset increases. You knit it long enough to pick up an additional one sixth of
the stitches on EACH side of the flap, giving the heel a total of one half of the number of stitches on the foot/leg (See? Just like normal!)
Examples:
My Classic Wool sock had 48 stitches in the foot. The small flap was knitted on 8 stitches and I picked up 8 more on each side of the flap, giving 24 stitches in total. My Koigu socks had 72 stitches in the foot. This gives me 12 stitches for the flap and 12 more picked up on each side, for a total of 36 in the heel.
Note that I did say approximately one-sixth of the stitches - if you are knitting for someone with a rather wide heel, you might want to make the small flap a couple of stitches wider and pick up one less stitch on each side. Conversely, for a narrower heel, you could make the flap on a couple of stitches less and pick up an extra stitch on each side.
Getting Started:
After you've completed your gusset increases, knit to the centre of the sole of the sock then another half of the number of stitches for your small flap. For example, for the Classic Wool socks, the small flap takes 8 stitches, so I knitted to 4 stitches past the centre of the sole. Place the stitches for the small flap on one needle and rearrange the remaining stitches.
Click on any photo to see a larger image. Use your browser's back button to return to this page
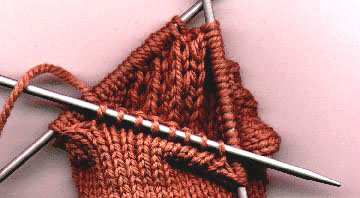 Step one
You now knit (and purl!) back on forth on these small flap stitches until it is long enough to pick up your additional stitches. Wrong Side Rows: slip 1 (as if to purl), purl to the end Right Side Rows: slip 1 (as if to purl), knit to end.
This method gives a nice chain selvedge stitch that is easy to pick up. Note that you need twice as many rows as you have stitches to pick up. For example, I will pick up 8 stitches on each side, so I need 16 rows.
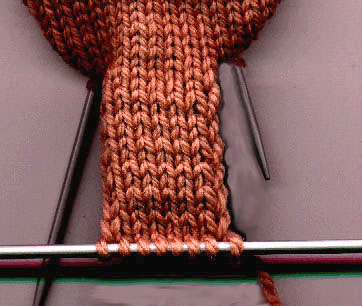 Step two
Once the small flap is long enough, knit across a right side row. Take another needle (I often use a smaller size dpn) and pick up the loops on the left side of the flap. Knit them. You may want to pick up an extra loop near the last loop and knit them together, to prevent a hole.
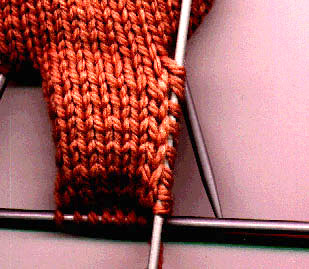 Step three
The above photo shows the stitches picked up but not yet knitted. I will knit into the front of the picked up loops as this will twist the loops and eliminate any holes.
After knitting the loops, turn , slip 1 and purl back. Now you have to pick up stitches on the right side of the small flap.
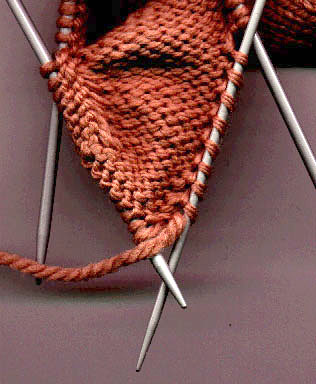 Step four
The above photo shows the reverse side of the work after picking up (but not knitting) the loops on the right side of the small flap. Knitting into the front of these loops twists them and eliminates any holes. Again, you may want to pick up an extra loop near the last one and purl them together.
>From here one we will work in heel stitch and start joining the heel to the rest of the sock:
Right Side Rows: *sl1, k1, repeat from * to last stitch, ending ssk (OR slip 1, k1, psso if you prefer). This ssk includes the last stitch of the heel and one stitch from the stitches in waiting on the other needles.
Wrong side rows: Sl 1, purl to last stitch, p2tog. This p2tog includes the last stitch of the heel and one stitch from the stitches in waiting on the other needles.
Continue with these two rows until you have decreased to your original number of stitches on the foot (for my Classic Socks, I will decrease until I am back to 48 stitches).
When you have completed the last decrease, return to knitting circularly. Continue your instep pattern. On the next round, continue the instep pattern all the way around the sock.
Knit on up the leg!
![]()